[ Home | Scripts | Tutorials | Templates ]

HTML Tutorial Unit 1

Lesson 1 - basic layout

Do not copy and paste any code you see here unless I say otherwise.  Some text editors try to format pasted text resulting in errors on your web page.

Lets try and make your first web page.  We will talk about the code later.  Open your favorite text editor and type the following:

<head>
</head>
<body>
Hello world!
</body>
</html>

Save the file and name it hello.html. Now view the file in your browser.  There are a few different ways to do this.  First you could try and just double-click on the icon of the file.  You could also open your browser and type the location of the file on your hard drive into the location bar.  On some browsers, you could also select file open and choose the file.

If you did everything correct, you should see something like this screen shot.  If your still with me, I will explain the code.  Every web page starts out with the <html> tag (You learn more about tags in the next lesson).  This tells the browser that its looking at a web page and not gibberish.   You put more advanced code in the head.  In the body is the junk that gets displayed on the screen.  That about raps it up.  See you in lesson 2.


Lesson 2 - Comments and tags

You can think of a tag as a description of what to do.  All tags have left and right angle braces (<and>).  Most tags also have a closing tag that has angle braces and a forward slash (</tag>).  Here is an example:

<html>
</html>

You should recognize this code from the last lesson.  Tags can also have attributes and values to give you even more control.  Values are always in quotes (" and ") with an equals sign (=).  Here is an example:

<body bgcolor="black">

You don't have to include an attribute.  Every attribute must have a value though.  Incase you were wondering, the previous example makes the background black.  The following is a diagram that may help:

Tags can also have multiple attributes and values such as:

<body bgcolor="black" text="white" link="red">

Are you still with me?  Then we will talk about a special tag called a comment.  You can use comments to place notes in your code.  These comments will be ignored by browsers so no one will know that there there.  You create a comment tag by using <!--your comment here-->.  You can put anything in a comment except angle braces (< and >).  Here are some examples.

<!--No one can see this-->

<html> <!--standard line of code in a web page-->

Commenting your code is a good habit.  If you are still alive, let's move to lesson 3.

Lesson 3 - Text Formatting

What is a boring old black and white web page good for?  Absolutely nothing, I say.  This is going to be a long lesson, so pay attention.  Let's learn the basic formatting tags.

<u>Underlined text</u> <!--the 'u' tag creates underlined text-->
<i>Italicized text</i> <!--the 'i' tag creates italicized text-->
<b>Bold text</b> <!the 'b' tag creates bold text-->

Underlined text
Italicized text
Bold text

That wasn't so tough, was it?  If you accomplished that, then we can move to headings.  There are six tags to use that create headings.  Headings are vary important and can add effect to your web site.  There are six sizes (one tag per size).  One is the largest and six is the smallest.  This may be confusing because normally the larger the number, the larger the text.

<h1>Very Big</h1>
<h2>Big</h2
<h3>Normal</h3>
<h4>Small</h4>
<h5>Very small</h5>
<h6>Who needs this?</h6>


Very big

Big

Normal

Small

Very small
Who needs this?
                        
You can also use the first three tags that we discovered inside of the heading tags.

<h3>This is <u>fun</u></h3>
<h3><i>I</i> will try the <i>i</i> tag</h3>

This is fun
I will try the i tag

What kinds of tags can you combine?  Can you create cool looking titles for you web pages?  We will now learn the <font> tag and its wonderful attributes.  The basic setup is as follows:

<font size="5" color="red" family="Impact">Big Red</font>

Big Red

The font tag can accept three attributes.  You do not need to include all of these attributes.  The size attribute controls how big the font appears.  The value is a number from one to seven with seven appearing the largest.  Three is the default size.  The color attribute controls the text's color.  You can use a colors name, but many colors don't have names.  Some times you need to use the color's hexadecimal code (#rrggbb format).

<font color="#666699">A crazy color!</font>

A crazy color!

For more information on the hexadecimal color system, see our color chart.  Now if you haven't passed out at the keyboard yet, lets create another sample web page.  Open your text editor and type the following code or cut and paste it.

I put it in a text box so you can cut and paste it (less work)

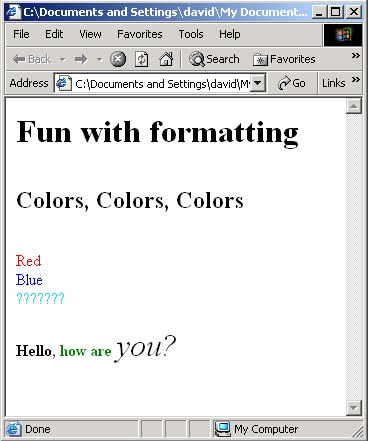
Save your file as fonts.html and preview it in your browser.  It should look like this.  If you are still on track, lets move to lesson four.

Lesson 4 - Hyperlinks

This will be an easy lesson.  We need to talk about some definitions before we begin.

HTML (Hyper Text Markup Language) - Language using hyperlinks to navigate from page to page
HTTP (Hyper Text Transfer Protocol) - Internet protocol used to request HTML documents from remote servers. Example: http://domain.com/webpage.html
Hyper Text (a.k.a. Link) - Text used to request a file.  Example: Top of page!

You should memorize these terms and definitions.  Links are very simple and easy to use.  There are four kinds of links:

Standard links:  http://www.google.com
Mailto links:  Email me at [email protected]
Undefined Links:  Click here for a definition!
Bookmark link: Click to go to lesson 1

Standard links are used to link to another web page.  Mailto links are for visitors to send an email directly.  Undefined links you don't need to worry about.  You probably won't use them unless you know JavaScript.  Bookmark links are links that go to a specified spot on a page.  You will learn about these with images.  Links are simple to create.  They only have one attribute, but it must be included.

<a href="http://www.url_of_your_page.com">Your text here</a>

That was a standard link.  Easy right?  Now for a mailto link.

<a href="mailto:address@where_ever.com">

Still very simple correct?  Let's try some examples:

<a href="http://www.yahoo.com">Go to yahoooooooooooo!</a>
<a href="http://www.dogpile.com">A search engine</a>
<a href="mailto:[email protected]">My email address</a>

Go to yahoooooooooooo!
A search engine

My email adress

Vary easy.  You can also use images as links, but we will learn that later.

Have you ever seen a web page without links?  Can you make a page with links to your favorite sites?  Can you create a page with email links to all of your friends?

You have finished your first unit!

Overview | Back | Next Unit